Access Lists - User Guide
Overview
Access Lists provide a powerful way to control inbound access to your domains using IP allowlists and HTTP Basic Authentication. Use Access Lists to restrict admin panels, staging sites, APIs, or any endpoint that should not be publicly accessible, while keeping deployments simple and auditable.
Key Features
- ✅ IP Whitelisting: IPv4, IPv6, and CIDR range support for network-based access control
- ✅ HTTP Basic Authentication: Password-protected access with individual user accounts
- ✅ Combined Mode: Use both IP whitelisting and password authentication together
- ✅ Per-Domain Policies: Apply different access lists to different domains
- ✅ Flexible Assignment: Assign access lists to multiple domains or change assignments anytime
- ✅ Real-time Validation: Prevent malformed IP addresses and duplicate rules
- ✅ Multi-User Support: Multiple user accounts with individual credentials
- ✅ Easy Management: Intuitive web interface for all operations
Access Control Types
| Type | Description | Use Case |
|---|---|---|
| IP Whitelist | Allow access only from specific IP addresses or ranges | Office networks, VPNs, known servers |
| HTTP Basic Auth | Require username and password | Individual user access, developer accounts |
| Combined | Both IP whitelist AND password required | Maximum security for sensitive endpoints |
How It Works
Client Request
      ↓
[Access List Check]
      ↓
 IP Whitelist? → Yes/No
      ↓
HTTP Basic Auth? → Yes/No
      ↓
[Allow/Deny Access]Getting Started
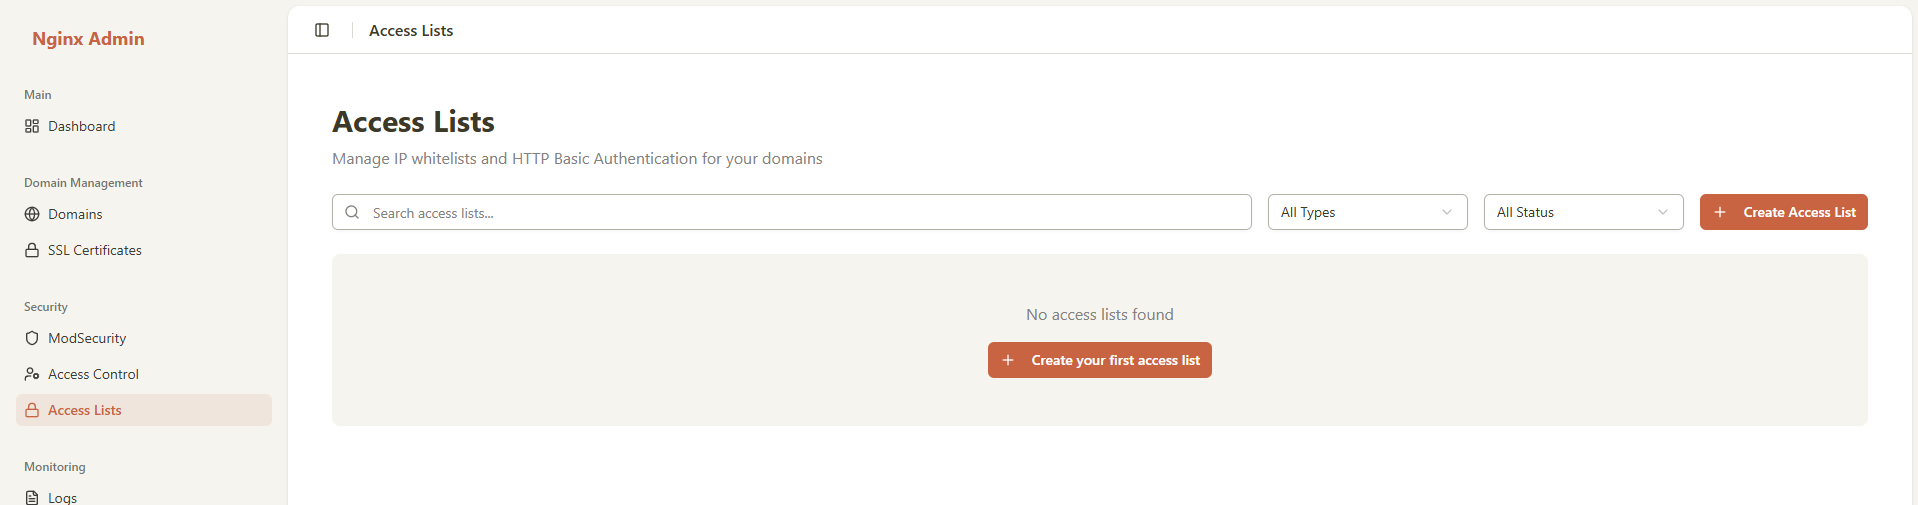
Accessing Access Lists
- Log in to the Nginx WAF Management Platform
- From the left menu, select Access Lists
- You will see the Access Lists dashboard with existing lists
Dashboard Overview
The Access Lists page displays:
- Statistics Cards: Total access lists, enabled lists, total auth users, assigned domains
- Search Bar: Quick search by name or description
- Filters: Filter by type (IP Whitelist, HTTP Basic Auth, Combined) and status (Enabled/Disabled)
- Access List Cards: Visual cards showing each access list's details
- Create Button: Create new access lists
Creating an Access List
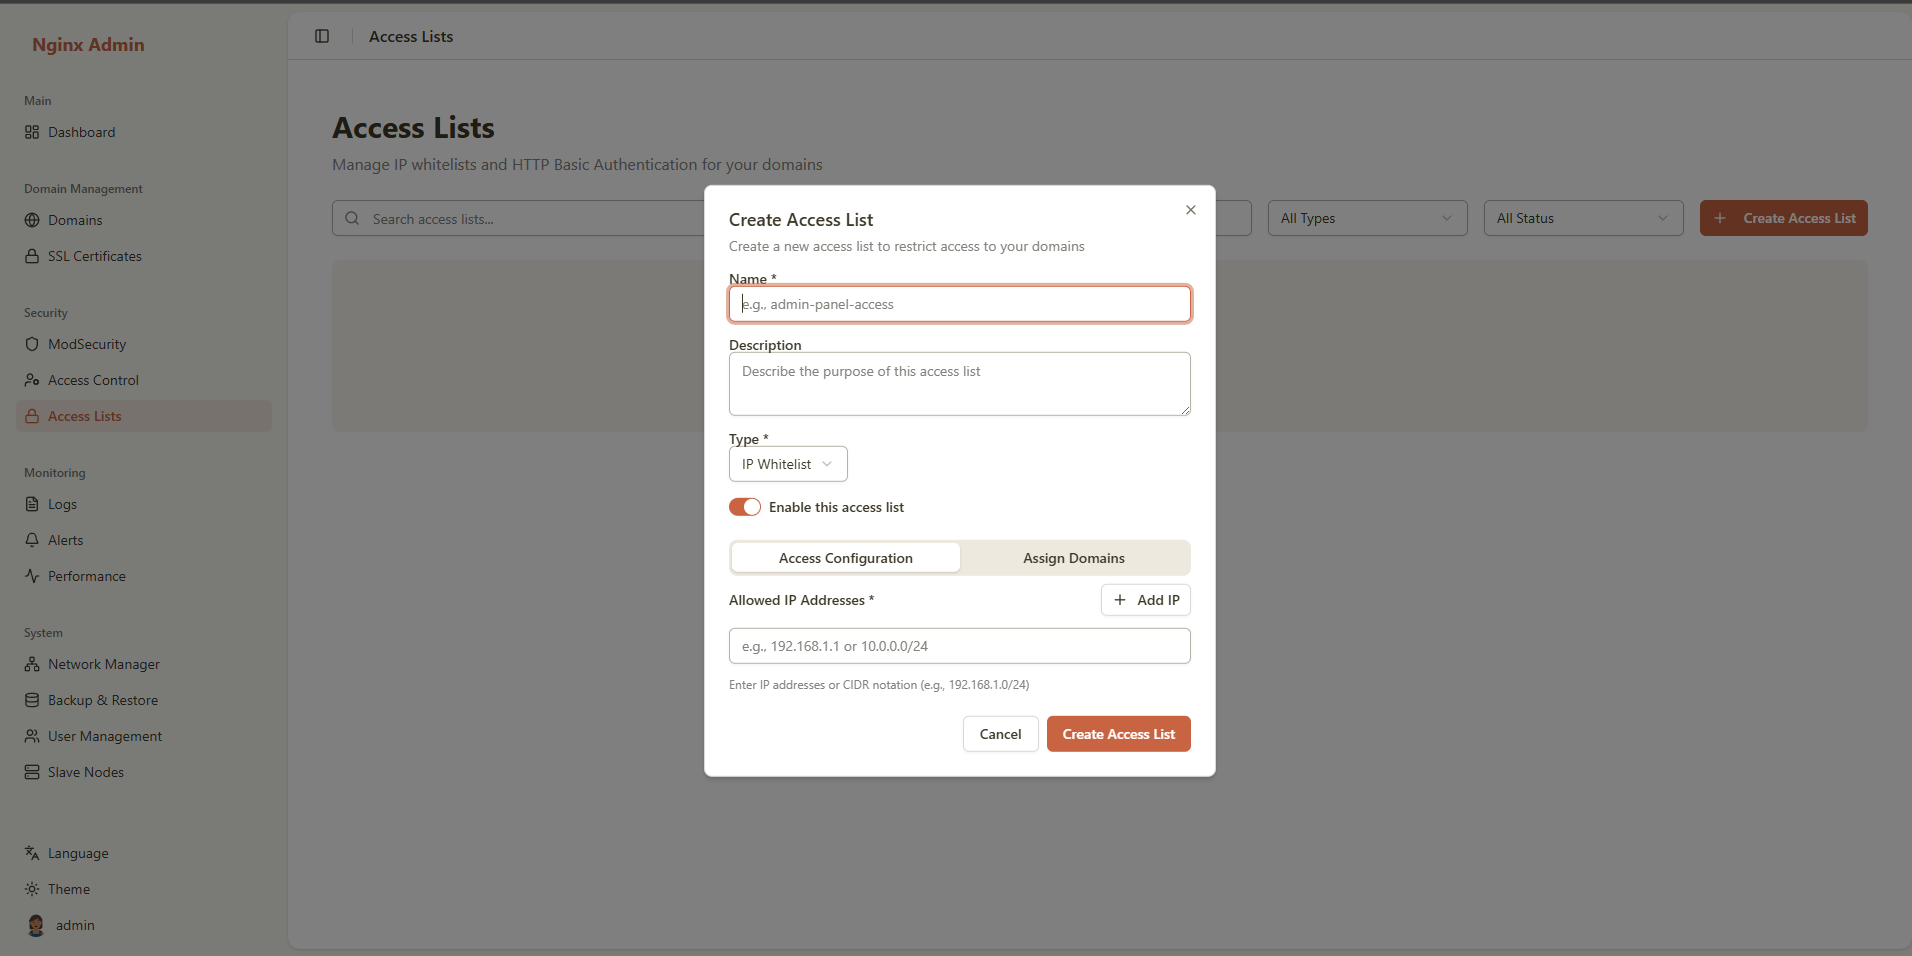
Step 1: Open Create Dialog
- Click the "Create Access List" button in the top right
- The create dialog will open with multiple configuration sections
Step 2: Basic Information
Name
- Required: Yes
- Format: Letters, numbers, hyphens (-), and underscores (_) only
- Length: 3-100 characters
- Unique: Must not conflict with existing access lists
- Examples:
admin-panel-accessstaging-envapi-whitelist
Description
- Optional: Yes
- Length: Up to 500 characters
- Purpose: Explain what this access list is for
- Examples:
- "Access control for admin dashboard"
- "Restrict staging environment to office IPs"
- "API access for partner integrations"
Step 3: Select Access Control Type
Choose the appropriate type based on your security requirements:
IP Whitelist Only
- Use when: You want to restrict access by network location
- Best for:
- Office/corporate networks
- VPN endpoints
- Known server IPs
- Cloud provider IP ranges
- Security Level: Medium (IP addresses can change or be spoofed)
HTTP Basic Auth Only
- Use when: You need individual user authentication
- Best for:
- Developer access
- Individual user accounts
- Remote team members
- Temporary access grants
- Security Level: Medium (credentials must be kept secure)
Combined (IP + Auth)
- Use when: You need maximum security
- Best for:
- Production admin panels
- Sensitive APIs
- Financial systems
- Compliance requirements
- Security Level: High (requires both correct IP AND valid credentials)
Step 4: Configure IP Whitelist (if applicable)
For IP Whitelist or Combined type:
Adding IP Addresses
- Click "Add IP Address" button
- Enter IP address or CIDR range in the input field
- Add more IPs as needed
- Remove unwanted IPs by clicking the trash icon
Supported Formats
Individual IPv4 Address
192.168.1.100
10.0.0.50
203.0.113.25CIDR Notation (IP Range)
192.168.1.0/24    # 192.168.1.0 - 192.168.1.255 (256 addresses)
10.0.0.0/16       # 10.0.0.0 - 10.0.255.255 (65,536 addresses)
172.16.0.0/12 # 172.16.0.0 - 172.31.255.255 (1,048,576 addresses)Cloud Provider IP Ranges (Examples)
# AWS EC2
52.0.0.0/11

# Google Cloud
35.190.0.0/16

# Azure
13.64.0.0/11IP Whitelist Validation
The system automatically validates:
- ✅ Valid IPv4 format
- ✅ Valid CIDR notation
- ✅ No duplicate IPs
- ❌ Invalid formats rejected
- ❌ Malformed CIDR ranges rejected
Best Practices
- Start restrictive: Add only necessary IPs
- Document sources: Use description to note what each IP is for
- Use CIDR for ranges: More efficient than listing individual IPs
- Regular review: Remove IPs that are no longer needed
- Emergency access: Keep a backup access method
Step 5: Configure HTTP Basic Authentication (if applicable)
For HTTP Basic Auth or Combined type:
Adding Authentication Users
- Click "Add User" button
- Fill in user credentials
- Add multiple users as needed
- Remove users by clicking the trash icon
User Fields
Username
- Required: Yes
- Format: Letters, numbers, hyphens (-), and underscores (_) only
- Length: 3-50 characters
- Unique: Must be unique within this access list
- Examples:
john_doe,admin-user,api_client_1
Password
- Required: Yes (for new users)
- Minimum Length: 4 characters
- Recommended: 12+ characters with mixed case, numbers, symbols
- Storage: Hashed using Apache htpasswd format (bcrypt/apr1)
- Security: Never stored in plain text in Nginx configs
Description (Optional)
- Length: Up to 200 characters
- Purpose: Note who this account is for or its purpose
- Examples:
- "John Doe - Developer"
- "Emergency admin access"
- "Partner API integration"
Password Security
The system uses Apache htpasswd format for password storage:
- Passwords are hashed before storage
- Uses bcrypt or apr1 algorithm
- Secure against rainbow table attacks
- Passwords are validated on each request by Nginx
Managing Users
Adding Multiple Users
User 1:
  Username: admin
  Password: SecureP@ss123!
  Description: Primary administrator

User 2:
  Username: developer
  Password: DevAccess456
  Description: Development team access

User 3:
  Username: readonly
  Password: ViewOnly789
Description: Read-only monitoring accessStep 6: Assign to Domains (Optional)
You can assign the access list to domains immediately or later.
Assigning During Creation
- In the "Assign Domains" section, you'll see a list of available domains
- Check the domains you want to protect with this access list
- You can select multiple domains
- Domains can be added or removed later
Domain Assignment Options
- Immediate Assignment: Apply protection right away
- Later Assignment: Create the access list first, assign domains later
- Multiple Domains: One access list can protect multiple domains
- Per-Domain Override: Each domain can have its own access list
Step 7: Enable or Disable
Use the "Enable this access list" toggle:
- ✅ Enabled: Access list is active and enforced on assigned domains
- ❌ Disabled: Access list exists but is not enforced (useful for testing)
Step 8: Create Access List
- Review all settings
- Click "Create" or "Create Access List" button
- The system will:
- Validate all inputs
- Generate Nginx configuration files
- Create htpasswd file (if using HTTP Basic Auth)
- Apply to selected domains
- Reload Nginx
- Display success notification
Editing an Access List
How to Edit
- Find the access list in the dashboard
- Click the "Edit" button on the access list card
- The edit dialog opens with current settings
- Make your changes
- Click "Update" to save
What You Can Edit
- ✅ Name: Change the identifier (must remain unique)
- ✅ Description: Update the description
- ✅ Type: Change between IP Whitelist, HTTP Basic Auth, or Combined
- ⚠️ Warning: Changing type may require adding missing configuration
- ✅ Enabled Status: Toggle on/off
- ✅ IP Addresses: Add, modify, or remove IPs
- ✅ Auth Users: Add, modify, or remove users
- ✅ Domain Assignments: Add or remove domains
Editing Auth Users
Important Notes:
- To keep existing password: Leave password field empty when editing
- To change password: Enter a new password
- To remove user: Click the trash icon
- To add user: Click "Add User" button
Important Considerations
- ⚠️ Active connections: Existing authenticated sessions may continue until expired
- ⚠️ IP changes: Removing an IP will immediately block users from that IP
- ⚠️ Domain assignments: Changes apply immediately after Nginx reload
- ✅ Best practice: Test changes in staging before applying to production
Managing Domain Assignments
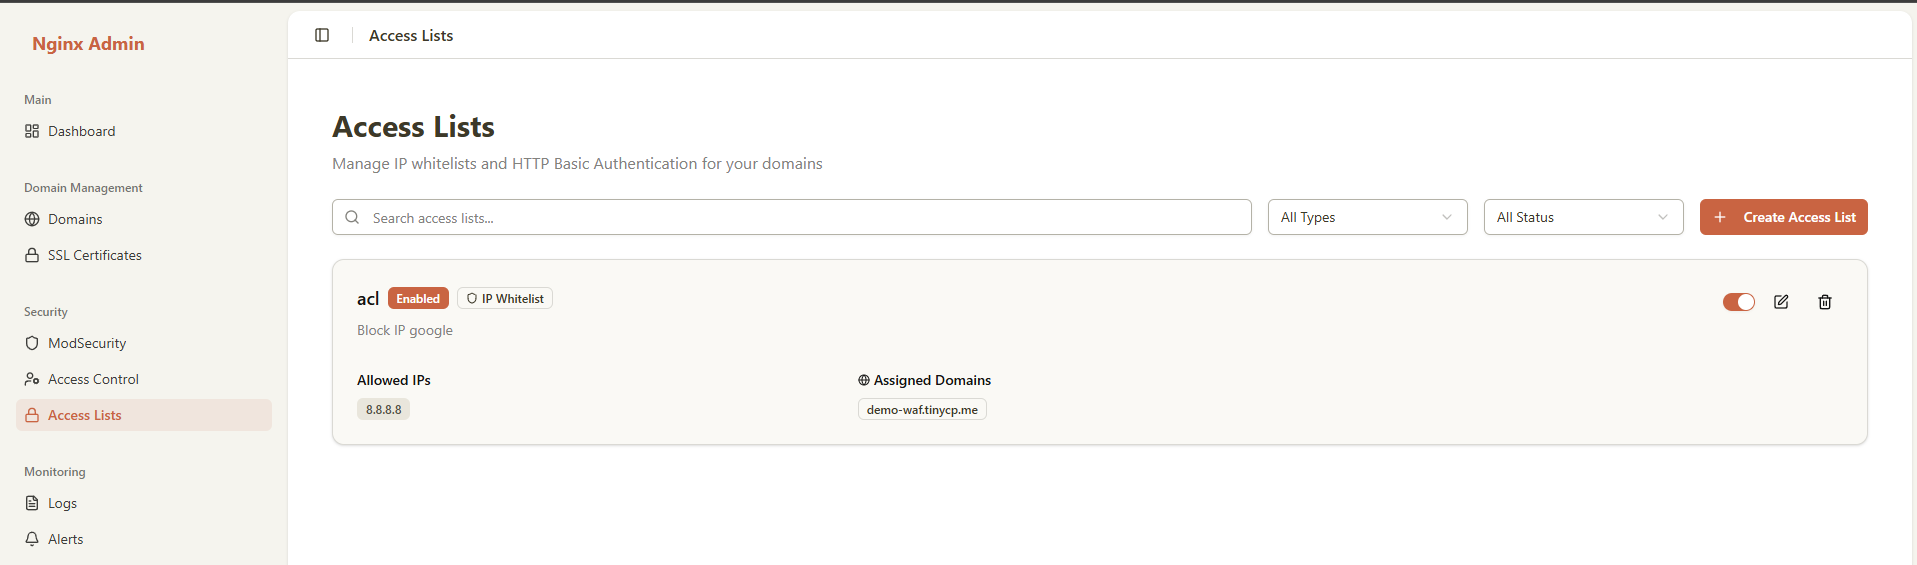
Viewing Assigned Domains
Each access list card shows:
- Number of assigned domains
- List of domain names
- Status of each domain
Adding Domains to Access List
Method 1: During Edit
- Click "Edit" on the access list
- In the "Assign Domains" section, check additional domains
- Click "Update"
Method 2: From Domain Management (if available)
- Go to Domains section
- Select a domain
- Assign access list from domain settings
Removing Domains from Access List
- Click "Edit" on the access list
- Uncheck domains you want to remove
- Click "Update"
- Confirmation may be required
- Access restrictions are removed from those domains immediately
Domain Assignment Status
Each domain shows:
- Enabled: Access list is actively enforced
- Disabled: Access list is assigned but not enforced
Deleting an Access List
How to Delete
- Find the access list you want to delete
- Click the "Delete" button on the access list card
- A confirmation dialog will appear
- Confirm the deletion
What Happens When Deleting?
- ❌ Access list is removed from database
- ❌ Nginx configuration files are deleted
- ❌ htpasswd files are deleted (if HTTP Basic Auth)
- ❌ All domain assignments are removed
- ❌ Nginx is reloaded
- ⚠️ Protected domains become publicly accessible
Important Warnings
- Cannot be undone: Deletion is permanent
- Domains unprotected: All assigned domains will lose protection immediately
- Active users: Users currently accessing will continue until session expires
- Best practice: Disable first, test, then delete
Before Deleting
Recommended steps:
- Review assignments: Check which domains will be affected
- Disable first: Toggle access list to disabled
- Test impact: Verify domains are accessible as expected
- Create backup: Document IP addresses and users if needed for recreation
- Then delete: Only delete when sure it's no longer needed
Search and Filter
Search Functionality
Use the search bar to find access lists:
- Search by name
- Search by description
- Real-time search (results update as you type)
- Case-insensitive matching
Filter by Type
Filter dropdown options:
- All Types: Show all access lists
- IP Whitelist: Only IP-based access control
- HTTP Basic Auth: Only password-based access control
- Combined: Only combined IP + password access control
Filter by Status
Status filter options:
- All Status: Show all access lists
- Enabled: Only active access lists
- Disabled: Only inactive access lists
Pagination
- Default: 10 items per page
- Navigation: Previous and Next buttons
- Page indicator: "Page X of Y"
Use Cases & Best Practices
Use Case 1: Protecting Admin Panel
Scenario: Lock down WordPress admin or application admin panel
Recommended Configuration:
Name: admin-panel-access
Type: Combined
Description: Admin panel protection for production

IP Whitelist:
  - 203.0.113.0/24      # Office network
  - 198.51.100.50       # VPN gateway
  - 192.0.2.100         # Admin's home IP

HTTP Basic Auth:
  Username: admin
  Password: StrongP@ssw0rd!2024
  Description: Primary admin account

Assigned Domains:
  - admin.example.com
- cms.example.comWhy Combined?
- IP whitelist ensures only trusted networks
- Password adds individual accountability
- Maximum security for sensitive area
Use Case 2: Staging Environment Protection
Scenario: Restrict access to staging/development environment
Recommended Configuration:
Name: staging-access
Type: HTTP Basic Auth
Description: Development and testing access

HTTP Basic Auth:
  User 1:
    Username: developer1
    Password: DevPass123
    Description: Frontend developer

  User 2:
    Username: developer2
    Password: BackendDev456
    Description: Backend developer

  User 3:
    Username: qa_tester
    Password: QATest789
    Description: QA team access

Assigned Domains:
  - staging.example.com
- dev.example.comWhy HTTP Basic Auth?
- Developers work from various locations
- Easy to add/remove team members
- Individual access tracking
Use Case 3: API Endpoint Protection
Scenario: Restrict API access to known partners
Recommended Configuration:
Name: api-partner-access
Type: IP Whitelist
Description: Partner API access control

IP Whitelist:
  - 52.1.2.0/24         # Partner A datacenter
  - 35.100.50.100       # Partner B server
  - 203.0.113.25        # Partner C gateway

Assigned Domains:
- api.example.comWhy IP Whitelist?
- Server-to-server communication
- Predictable IP addresses
- No password management needed
Use Case 4: Office-Only Access
Scenario: Internal tools accessible only from office
Recommended Configuration:
Name: office-network-only
Type: IP Whitelist
Description: Office network restriction

IP Whitelist:
  - 203.0.113.0/24      # Main office network
  - 198.51.100.0/25     # Branch office
  - 192.0.2.50          # Remote office VPN

Assigned Domains:
  - intranet.example.com
  - tools.example.com
- internal.example.comUse Case 5: Emergency Admin Access
Scenario: Backup access method for emergencies
Recommended Configuration:
Name: emergency-access
Type: HTTP Basic Auth
Description: Emergency admin access - use only when primary fails
Enabled: No (keep disabled until needed)

HTTP Basic Auth:
  Username: emergency_admin
  Password: VeryStr0ng!Emergency#Pass2024
  Description: Break glass emergency access

Assigned Domains:
- example.comUsage:
- Keep disabled normally
- Enable only during emergencies
- Disable again after emergency resolved
Best Practices
1. Principle of Least Privilege
- ✅ Minimal IPs: Only whitelist necessary IP addresses
- ✅ Remove unused: Regularly audit and remove old IPs
- ✅ Specific ranges: Use smallest CIDR range needed
- ❌ Avoid: Don't whitelist entire internet ranges (0.0.0.0/0)
2. Password Security
- ✅ Strong passwords: Minimum 12 characters, mixed case, numbers, symbols
- ✅ Unique passwords: Different password for each user
- ✅ Regular rotation: Change passwords periodically
- ✅ Secure distribution: Use secure channels to share passwords
- ❌ Avoid: Don't reuse passwords across systems
3. Access List Organization
Naming Conventions:
Format: <purpose>-<type>-access

Examples:
- admin-panel-access
- staging-env-access
- api-partners-access
- office-network-accessDescription Best Practices:
Include:
- Purpose: What this protects
- Owner: Who manages this
- Contact: Who to contact for access
- Review date: When to review/update

Example:
"Admin panel protection for production environment.
Managed by: Security Team (security@example.com)
Last reviewed: 2024-10-18
Next review: 2025-01-18"4. Testing Strategy
Before applying to production:
- Create in disabled state: Set enabled=false initially
- Test configuration: Verify Nginx config is valid
- Test from allowed IP: Confirm access works
- Test from blocked IP: Confirm access is denied
- Test authentication: Verify credentials work
- Enable: Set enabled=true
- Monitor: Check logs for issues
5. Documentation
Maintain documentation for:
- IP address sources: Where each IP comes from
- User accounts: Who each account belongs to
- Assignment rationale: Why each domain has its access list
- Change history: Track all modifications
6. Regular Audits
Monthly:
- Review IP addresses for accuracy
- Remove departed users
- Check for unused access lists
Quarterly:
- Full security audit
- Password rotation
- Update documentation
Annually:
- Complete access review
- Update security policies
- Train team on best practices
7. Monitoring
Watch for:
- 403 Forbidden errors: May indicate IP address changes
- 401 Unauthorized: Failed authentication attempts
- Unusual patterns: Multiple failed attempts may indicate attack
- Access from new IPs: Investigate unexpected sources
Troubleshooting
Issue 1: Cannot Access Protected Domain
Symptoms: Getting 403 Forbidden or 401 Unauthorized error
Possible Causes:
- IP not whitelisted: Your IP address is not in the allowed list
- Wrong credentials: Username or password incorrect
- Access list disabled: Access list is not enabled
- Not assigned: Access list is not assigned to this domain
- Nginx not reloaded: Changes not applied yet
Solutions:
Check Your IP Address:
# Find your current IP
curl ifconfig.me
# or
curl ipinfo.io/ipVerify IP is in Whitelist:
- Go to Access Lists
- Find the relevant access list
- Check if your IP is listed
- If not, add it and update
Test Credentials:
- Double-check username (case-sensitive)
- Double-check password (case-sensitive)
- Try password reset if available
- Check for special characters that might be escaped
Check Access List Status:
- Verify access list is Enabled
- Verify access list is assigned to the domain
- Check Nginx logs:
tail -f /var/log/nginx/error.log
Issue 2: Access List Not Working After Creation
Symptoms: Created access list but still can access without restrictions
Possible Causes:
- Not enabled: Access list is disabled
- Not assigned: Access list not assigned to domain
- Nginx not reloaded: Configuration not applied
- Cache: Browser or CDN cache
Solutions:
Verify enabled status:
- Check the toggle is ON (enabled)
Verify domain assignment:
- Edit access list
- Check domain is selected
- Save and update
Force Nginx reload:
bashsudo nginx -t sudo nginx -s reloadClear cache:
- Clear browser cache
- Try incognito/private mode
- Clear CDN cache if using one
Issue 3: IP Address Changed, Now Blocked
Symptoms: Was able to access before, now getting 403 Forbidden
Cause: Your IP address changed (common with dynamic IPs, VPNs)
Solutions:
Temporary Solution:
- Use HTTP Basic Auth if available (Combined type)
- Access from a whitelisted network
- Contact admin to add new IP
Permanent Solution:
- Add IP range (CIDR) instead of single IP
- Use VPN with static IP
- Switch to Combined type (IP + Auth)
- Request static IP from ISP
Issue 4: Cannot Update Access List
Symptoms: Error when trying to save changes
Possible Causes:
- Name conflict: New name already exists
- Validation error: Invalid IP format or missing required fields
- Type mismatch: Changing type but missing required configuration
- Permissions: User doesn't have edit rights
Solutions:
Read error message carefully: It usually indicates the specific problem
Validation errors:
- Check IP addresses for valid format
- Ensure at least one IP for IP Whitelist type
- Ensure at least one user for HTTP Basic Auth type
- Check Combined type has both IPs and users
Name conflicts:
- Choose a different, unique name
Permissions:
- Verify you have admin or moderator role
Issue 5: Users Getting Repeated Password Prompts
Symptoms: Browser keeps asking for password even after entering correct credentials
Possible Causes:
- Wrong username/password: Credentials incorrect
- Realm mismatch: Nginx configuration issue
- Browser cache: Cached incorrect credentials
- Special characters: Password contains characters that need escaping
Solutions:
Verify credentials:
- Double-check username (exact match, case-sensitive)
- Double-check password (exact match, case-sensitive)
Clear browser credentials:
- Chrome: Settings > Privacy > Clear browsing data > Passwords
- Firefox: Settings > Privacy > Logins and Passwords
- Safari: Preferences > Passwords
Try different browser:
- Test in incognito/private mode
- Try different browser entirely
Check for special characters:
- Avoid:
",',\,$in passwords if possible - Or ensure they're properly entered
- Avoid:
Technical Details
Nginx Configuration
When you create an access list, the system generates Nginx configuration files:
IP Whitelist Configuration (/etc/nginx/access-lists/<name>.conf):
# IP Whitelist: office-access
# Office network restriction

allow 203.0.113.0/24;
allow 198.51.100.50;
deny all;HTTP Basic Auth Configuration (/etc/nginx/access-lists/<name>.conf):
# HTTP Basic Auth: admin-access
# Admin panel protection

auth_basic "Restricted Access";
auth_basic_user_file /etc/nginx/htpasswd/<name>.htpasswd;Combined Configuration:
# Combined Access List: admin-panel-access
# Maximum security for admin panel

# IP Whitelist
allow 203.0.113.0/24;
allow 198.51.100.50;
deny all;

# HTTP Basic Authentication
auth_basic "Restricted Access";
auth_basic_user_file /etc/nginx/htpasswd/<name>.htpasswd;Password Storage
Passwords are stored using Apache htpasswd format:
- Algorithm: bcrypt or apr1 (Apache MD5)
- File location:
/etc/nginx/htpasswd/<access-list-name>.htpasswd - Format:
username:hashed_password - Security: Passwords are never stored in plain text
How Access Control Works
Request Flow:
1. Client sends request to domain
2. Nginx checks if access list is assigned
3. If IP Whitelist: Check client IP against allowed IPs
4. If HTTP Basic Auth: Check Authorization header
5. If Combined: Check BOTH IP AND credentials
6. Allow or deny access based on resultsPrecedence:
- Most specific rules win
- IP whitelist checked first
- Then HTTP Basic Auth
- Failed check = immediate deny
Related Documentation
- Domain Management Guide
- ModSecurity WAF Guide
- Access Control Lists (ACL)
- Nginx Documentation
- HTTP Basic Authentication
Support
If you encounter issues not covered in this documentation:
- Check the FAQ
- See the Troubleshooting Guide
- Check Nginx error logs:
/var/log/nginx/error.log - Check Nginx access logs:
/var/log/nginx/access.log - Contact technical support
Last Updated: 2025-10-18
Version: 1.0.0